 |
| HELLO EVERYONE! It was Very Encouraging to have so many people interested in my last post as to how I made the Shabby Faux Birdcages. I was going to save THE TUTORIAL for later, but since I have a tendency towards laziness, I thought it best to present the whole thing now and just get it off the books. As you can see from the photo above, I made way more than I'll ever need because once I began making them, it was hard to stop. |
 |
| I made some with bottoms as well as some without. There are a couple with fancy tops which I shall show you later as well. The basic method applied to each, but as you can see- the varieties are achieved through using your own imagination . STEP 1 I began with some #30 gage florist wire. I used paper coated wire but I don't think that you have to. I would think that a glossy wire would probably require a different type of paint,( an enamel), so that it would stick. I haven't tried an enamel so I can't say for certain, well anyhoosie, I used paper covered wire. |
 |
| I found this package at the Thrift store! SCORE!!! and so this is why I used it. If you have a slightly bigger gage then try it out and see if it works for you. STEP 2 |
 |
| I cut TEN 14-inch lengths.however I SHOULD HAVE USED TEN- 10-INCH LENGTHS But I decided to err on the side of caution to make sure that I had enough wire for this particular cage. I based this on the size of the form that I'd chosen to use for the mold. Again, this measurement is flexible. You will see why in a moment. STEP 3 |
 |
| I bent the TEN wires in half so that I could find the mid-point. |
 |
| I took another short length of wire and I went through the middle and twisted it tight to anchor the centre. STEP 4 |
 |
| Because I am going to be building this cage from the bottom UP- I am clipping the centre wire. BUT if you are building it from the TOP DOWN, then leave the wire intact! |
It gets worse .....
but Stay tuned and hopefully you'll see what I mean.
 |
| Here I am trying to space the wires evenly because they are going to go over my form. And for THAT, - I have chosen a soft plastic bottle as seen below. |
 |
 |
| I got mine from the dollar store. It came in a package of 3 STEP 5 |
 |
| I cut off the nozzle end with a craft knife. I left as much of the lower portion intact because it will allow me to make cages of different lengths. |
 |
| The bottom of the bottle is going to be where I place the wires and work down. But first I have to add the bands that will hold them. I used quilling paper that I already had on hand. You will need a long length to wrap around the circumference of the bottle at least 3x's. |
 |
STEP 6 APPLY a SINGLE dab of glue, I used QUICK GRIP, as an anchor for the paper strip. |
 |
STEP 7 |
 |
| Wrap a length of quilling paper 3X's around the entire bottle |
 |
| You don't need any more glue until you come to the end of the third cycle. Secure the end of the paper strip with another dab of Quick Grip |
 |
| DONE! |
 |
| STEP 8 now chose the spacing for the next paper band, and repeat Steps Six and Seven the distance that you put between the bands is what determines the length of the body of your cage. |
 |
| DONE! Now this is where the wires come in.. For STEP 9 you centre you wires at the bottom of the plastic bottle and try to space them as evenly as you can. You can use a bit of GLUE to hold it in place or just use your thumb. Because these cages are destined to be aged, I got them close to being evenly spaced . |
 |
STEP 10 holding the wires at centre, run the spokes down and around the bottle over top of the 2 paper bands. Adjust them as necessary. |
 |
 |
| Hook-Anchor the ends of each wire over the edge of the bottle. |
 |
| STEP11 my wires were way too long so I had to trim off the excess, but leave enough to still hook over the edge |


 |
| It should look like this inside the bottle. STEP 12 use your glue and cover the ENTIRE SURFACE OF ONE of the paper bands THEN add 3 MORE layered bands of quilling paper over the top of the wires. |

 |
| The top layer of paper sandwiches the wires so that they won't shift or move so make sure that they are as straight as can be. |

 |
| And of course, mine is now OFF CENTRE >< oh well :/ Repeat the same process for the second band |

 |
| This is what it now looks like with both bands of quilling paper. |

 |
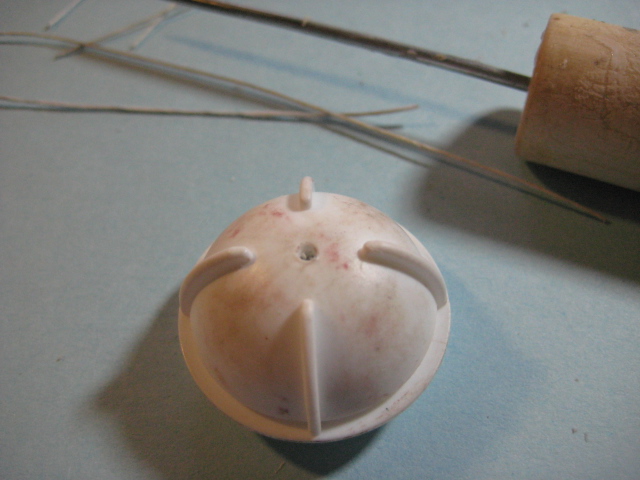
| The closed end could easily be the TOP of the cage if you so desired. However I'm planning to flip this baby around and use the open end as the TOP Below you can see what you can do with a different shaped mold. For the small one I used an old makeup lid. Leave your cage to set up and dry. |
 |
| And now for the top of the cage- enter CHANEL |
 |
| I happened to have some old Chanel sample containers that I was getting ready to throw away. Chanel distributed these with sample moisturizers and foundations in them. I don't know if they still sample their products this way, but I had 4 of these so this is what I used. and it just so happened that the screw portion fit nice and snug within the interior circumference of the birdcage which became the domed copper roof of La CAGE. |

 |
 |
| I pierced the centre with an awl, making the hole big enough for the doubled paper wire to pass through |
 |
 |
| I selected a filigree bead cap to tread the paper wire through. |
 |
| I doubled over a length of wire to form a loop and fed it through the hole in the bead cap leaving a length of about ONE inch. Then I treaded the 2 tails of the wire into the loops of the bead cap and secured it. |


 |
| Clip off the excess wire tails and then guide the top of the wire in and through the hole in the tub. |

 |
| Add additional beads to the stem of the twisted wire gluing in between each set of beads |
 |
| The filigree anchor will keep the beads in place |
 |
NOW IT'S BACK TO THE CAGE and onto - STEP 13 unhook the ends |

 |
| and using a hard flat tool, gently loosen the paper strips from the plastic form, running the tool just under the paper bands both top and bottom |


 |
| Use your tool to gently guide the form out, it should come away clean from the mold and leave you with the cage shape intact. |
 |
| The empty cage |
 |
| STEP 14 trim away the wire tails and test fit the roof of the cage to as pictured below BUT DON'T GLUE IT IN PLACE YET |
 |
| Add some filigree metal or paper for the bottom of the cage. I used a large scalloped paper punch to make an insert for inside the cage and a metal piece for the outside of my cage. |

 |
 |
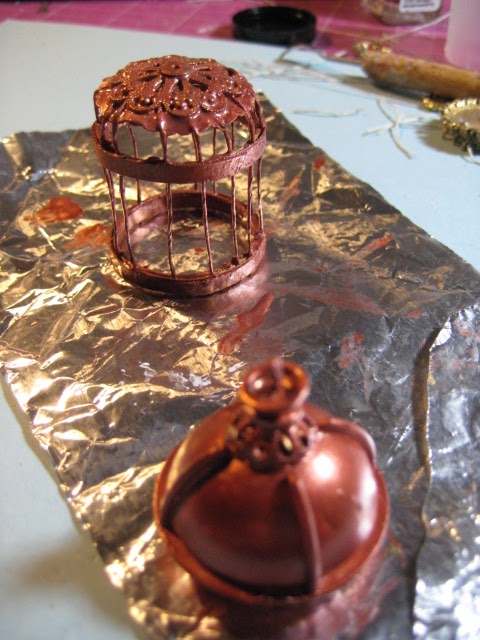
| Now for the paint I used a copper acrylic paint and I painted the entire cage inside and out. I painted the cage roof inside and out too and Left both of them to dry |

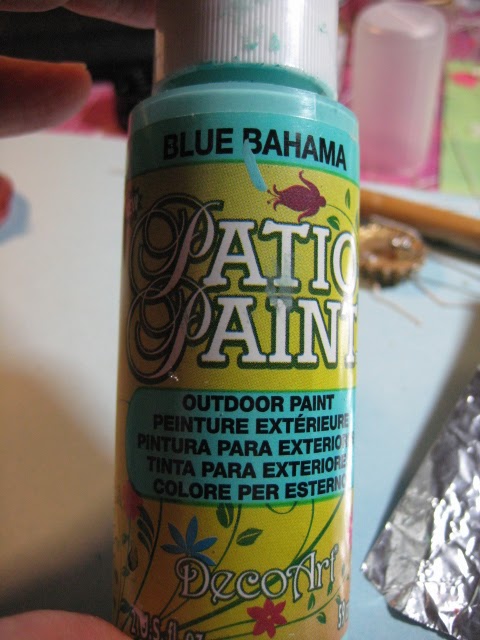 |
| When the copper paint was dry I went over the entire cage again with BLUE BAHAMA acrylic paint, which I purchased at Michael's. |
 |
| When that was dry I added a bit of Transparent Black Gel paint. This product is really thin and dries transparent. An alternate may be to dilute some black acrylic with some artist's gel medium and water to get a slurry. |

 |
| Brush the black wash lightly over the blue and let dry, glue on the roof and YOU'RE DONE! |
 |
| La Cage! #1 and below is La Cage #2 |
 |
| For #2, I made and added a Faux Cage door, as well as a perch. I'd also embellished the 2 paper bands with metal chains prior to painting them. Below is the entire lot! For the Shabby white cages I used white chalk paint as a base color and then aged them with the CINNAMON RUST! see my rusting tutorial "Meeting Rusty at the Game" http://studioeminiatures.blogspot.ca/2015/09/meeting-rusty-at-game.html |

 |
| Voila! and that's the end elizabeth :D |
.jpg)

